Welcome to the JeepSpecs.com in-depth page on the WK2 Jeep Grand Cherokee engine oil and filter change. Did we miss anything? get in touch with us and let us know!
Tools and parts needed
Engine oil (see chart below)
Oil filter (see chart below)
Oil filter wrench
Oil drain pan
Floor jack or ramps
Jackstands
Funnel
13mm open-end or socket wrench
Shop rags
Gloves
NOTE: It is best to change the oil after the vehicle has been driven and fully warmed up. Always wear appropriate eye protection when working under the vehicle.
NOTE: Some vehicles may be high enough off the ground to reach the oil filter and oil pan and may not require raising the vehicle.
Raising the vehicle with a floor jack
A. Turn ignition off and place vehicle in Park, securely set the parking brake. A flat surface is preferable. If on a slope it is recommended to place blocks under the rear wheels for additional safety.
B. Position floor jack in place, entering from the driver’s side of the vehicle and centering it on the cross beam. Slowly raise the jack enough to slightly lift the vehicle, then re-check that the jack is still centered front to back on the beam. Continue raising jack until the tires just start to clear the ground. Securely tighten the jack handle/lock.
C. Reaching in under the front of the vehicle, carefully install jackstands near the left and right sides. NEVER crawl under a raised vehicle until jackstands are properly in place.
D. Slowly let the jack down until the full weight of the vehicle is on the jack stands. Be prepared to quickly lock the jack should a jack stand slip from its position. Check to see that the jackstands are securely holding the vehicle. Next, raise the jack just enough to slightly take the pressure off of the jack stands and securely lock the jack.
Raising the vehicle with ramps
A. Carefully drive vehicle onto ramps, place vehicle in Park, secure parking brake and turn off ignition. Place chocks or a large block of wood behind each rear tire.
Changing the oil and filter
NOTE: 2011-up models may require removal of the front skid plate
1. Remove the oil filler cap. This allows the oil to drain quicker.
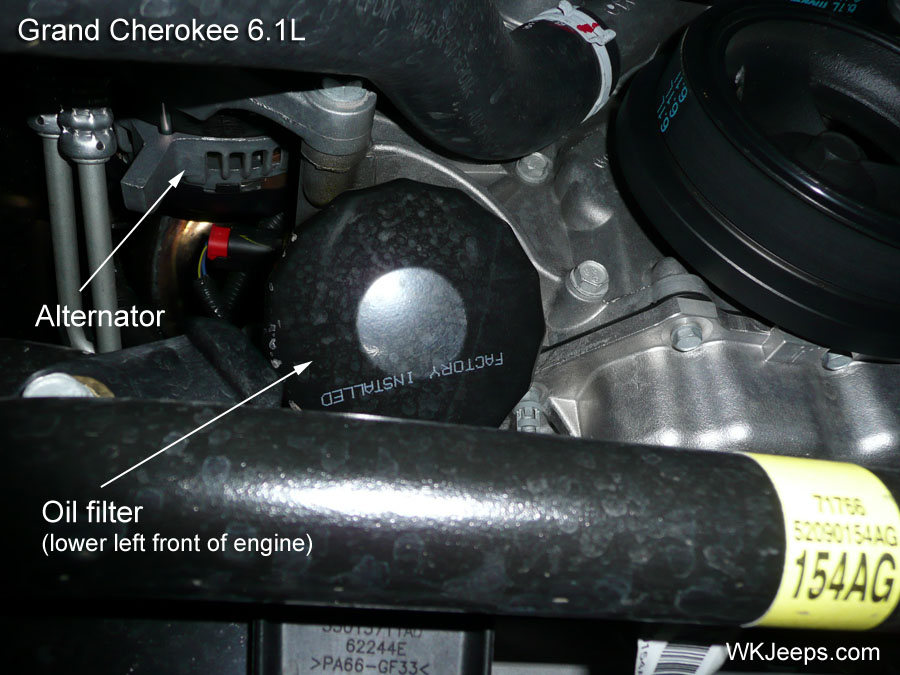
2. Slide the oil drain pan under the filter chute area and loosen oil filter. Turn the filter counter-clockwise to loosen. Once loose the filter can be unscrewed by hand. Doing this slowly allows less splashing of the oil. Caution: Oil and filter may be very hot!
3. With a clean shop rag, reach up and clean around the contact area of the oil filter mounting plate.
Important!!! Make sure the gasket from the old filter is not still in place.
4. Apply a small amount of oil around the gasket on the new filter. I also usually “pre-oil” the filter, putting in just enough oil so that it won’t spill out when being reinstalled. Install oil filter (clock-wise) and hand-tighten firmly. Use oil filter wrench and tighten another 1/2 turn or so. Clean outside of filter and all areas around filter with a shop rag. This will make it easier to spot any leaks.
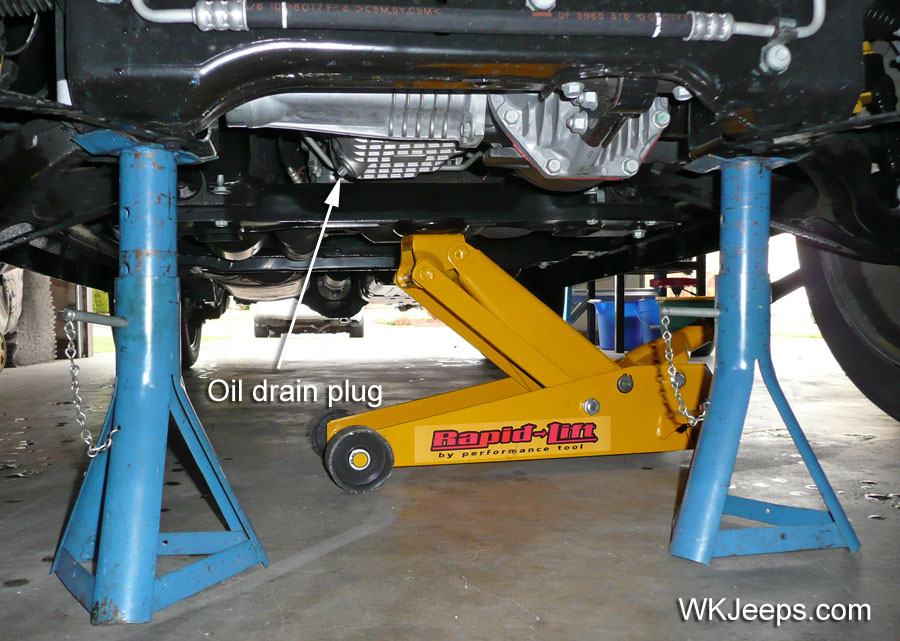
5. Position drain pan under oil pan. Be careful of touching hot exhaust pipes. Remove the drain plug (counter clockwise) and let oil drain, preferably for at least 15-20 minutes. Caution: Oil may be very hot!
6. Replace the oil pan drain plug and tighten to 20-25 ft. lbs./27-34 N·m (clockwise). Clean all areas around the drain plug with a shop rag.
7. Remove oil drain pan and properly dispose of oil. I drain mine into plastic 2-gallon empty laundry detergent bottles and take them to the recycling center a couple times a year.
8. Slightly raise vehicle and remove jack stands. Check underneath for any tools left behind. Lower vehicle and remove jack.
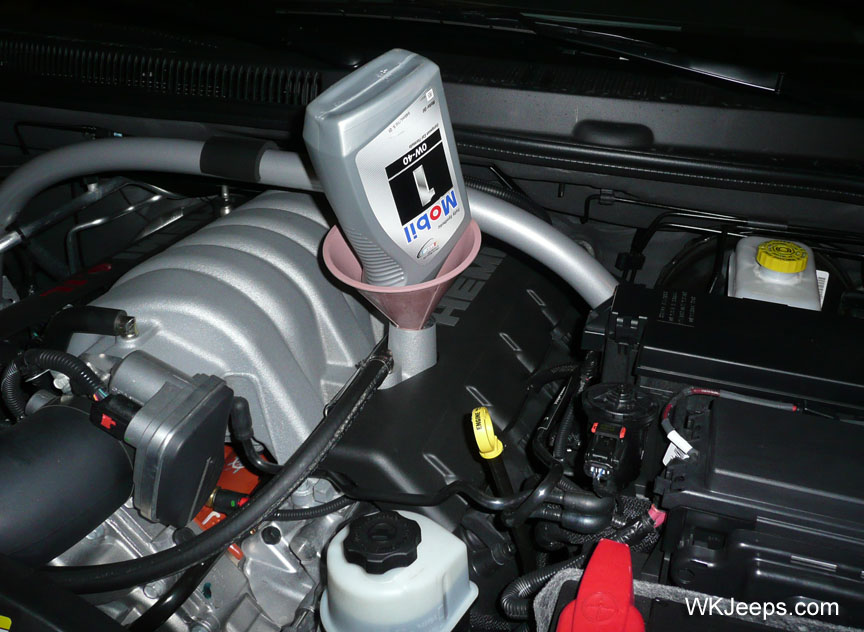
9. Place funnel into the oil fill tube and pour in the required amount of oil. In the Hemi models, some owners prefer to install 1/4 to 1/2 quart less than recommended, and then check the dipstick level after re-warming up the engine and letting it sit for a couple hours. Putting in less oil than recommended is not really necessary when the filter has been changed and the oil left to drain for the proper amount of time. Putting in the recommended amount of oil will never result in unsafe overfilling.
10. Reinstall oil filler cap and start engine. If in a garage back vehicle outside. Do not rev engine immediately, let it run for a couple minutes and then rpm’s can be raised up a bit to circulate the oil. With a flashlight, and staying clear of engine fan and belts, check the areas around the top of the filter for any leakage. Check the floor/ground area underneath the vehicle for any oil leakage from the filter or pan. It is normal for small amounts of USED oil to drip onto the floor in the next day or so after the change, especially if the area around filter was not thoroughly cleaned.
11. Turn off the engine and let sit for 10 minutes. Check the oil level. A reading slightly above the “Full” mark would not be of concern. Recheck area under vehicle for any signs of fresh oil drips. Recheck oil level periodically between oil change intervals.
|
|